
Liam's Hobby Room | 12 days ago

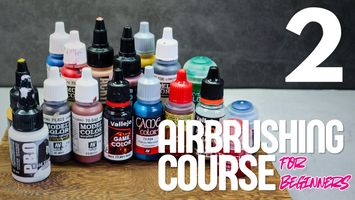
Airbrushing for Beginners 2

In Episode 1, we looked at an overview of the hobby so you could build some familiarity with the tools and general concepts involved in airbrushing. This time, we’re getting into one of the most intricate parts of the hobby: paint.


We’ll look at the main types of hobby paint, which ones are easiest for beginners, how to thin them properly, and what safety equipment you’ll need while spraying. There’s a lot of paint out there, but once you understand a few basic concepts, choosing and using it gets much easier.

Choosing Paint for Your Airbrush

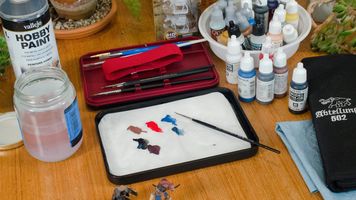
If you walk into your local hobby shop, you’ll probably find an entire wall of hobby-grade paints to choose from. These paints are specifically formulated for things like model kits, miniatures, figurines and other hobby projects. They’re different from general craft paints and artist paints in terms of consistency, pigmentation and how they behave when sprayed.


For beginners, I recommend sticking with hobby-grade paints and the appropriate cleaners and thinners designed for them. As I mentioned in Episode 1, different types of paint have different properties, different safety considerations and different reasons why people prefer them. There are advantages and disadvantages to each. If you’re ever unsure what type of paint is best for your setup, ask your local hobby shop. For most beginners, the easiest place to start will usually be water-soluble acrylic paint.

Episode 2: Introduction to Paint

We’ll look at the main types of hobby paint, which ones are easiest for beginners, how to thin them properly, and what safety equipment you’ll need while spraying. There’s a lot of paint out there, but once you understand a few basic concepts, choosing and using it gets much easier.

The Pros of Water-Soluble Acrylics

Water-soluble acrylic paints are some of the safest and easiest hobby paints to spray because they don’t produce the same toxic solvent fumes associated with paints like lacquers and enamels. However, that does not mean you should breathe them.


When you spray paint through an airbrush, you create very fine airborne paint particles called particulates. Those are the tiny particles of paint that eventually coat your model, but if they’re floating around your workspace, you can breathe them in as well.

Even if the bottle says the paint is non-toxic, you still don’t want to coat your lungs in acrylic polymer.


When spraying water-soluble acrylic paints, I recommend using an N95 mask, wearing gloves and working with proper ventilation. A spray booth will pull airborne paint particles away from your face and collect them in its filter. When you’re finished painting, it’s also a good idea to leave your spray booth running for another ten minutes or so to help remove any remaining airborne particles from your workspace.

Painting with water-soluble paints by paint brush or by airbrush is possible by thinning them with an arcylic thinner! 

The Cons of Water-Soluble Acrylics

Water-soluble acrylic paints are beginner-friendly, but they do have a few quirks. The first is that they dry very quickly. While you’re spraying, paint can begin drying on the exposed tip of your airbrush needle. This is commonly called tip dry. If it builds up enough, it can start affecting your spray pattern.


When this happens, gently clean the needle tip using a cotton swab and the appropriate thinner or cleaner. Water-based acrylic paint can also begin drying inside the airbrush nozzle. When this happens, you may notice spattering, speckling or even little pieces of semi-cured paint suddenly being fired out of the airbrush.


One way to reduce this problem is to avoid filling your colour cup more than necessary and to regularly mix, or percolate, your paint while working. We’ll talk much more about clogged airbrushes and dried paint in Episode 4.


Some common hobby-grade water-soluble acrylic paints include products from Vallejo, Pro Acryl, AK Interactive 3rd Gen, The Army Painter and Kaleido Colorworks. When thinning these paints, use a compatible water-based acrylic airbrush thinner. When cleaning your airbrush, use a compatible acrylic airbrush cleaner. Most major paint manufacturers make their own versions.

Solvent-Based Paints

The other major category you’ll encounter includes paints such as lacquers, enamels and alcohol-based paints. For simplicity, I refer to these as solvent-based paints.


These paints require the appropriate chemical thinner. Enamel paints use enamel thinner. Lacquer paints use lacquer thinner. Alcohol-based paints require the appropriate alcohol-based thinner recommended by the manufacturer. Lacquer thinner is particularly strong and can dissolve many types of paint, but that doesn’t mean you should mix whatever thinner you have with whatever paint you’re using. Using the wrong thinner can cause poor spraying performance, separation or other problems.


Solvent-based paints also require additional safety precautions. Alcohol, enamel and lacquer-based paints can produce volatile organic compounds, or VOCs, in addition to airborne paint particulates. For these paints, a normal dust mask or N95 isn’t enough protection on its own.


You’ll want to use a properly fitted dual-cartridge respirator, along with gloves, eye protection and a spray booth that vents your overspray outside. Solvent-based paints can produce excellent results, but they add another layer of complexity. For that reason, most beginners will probably find water-soluble acrylics easier to start with.

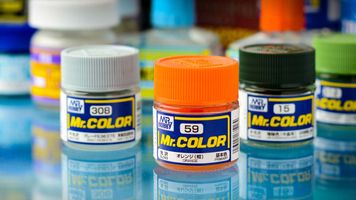
Mr. Color by GSI Creos is one of the world's most popular and reliable lacquer-based hobby paints, best suited for airbrushing.

Thinning Your Paint

Before you can start spraying, you need to understand paint consistency. When you buy a bottle of hobby paint, you’re actually getting more paint than it might initially appear because airbrush paint usually needs to be thinned before spraying. If you’ve painted with a brush before, you already know that paint straight from the bottle can be fairly thick. An airbrush has to push that paint through a very small nozzle, so the mixture needs to be significantly thinner.


There is no universal thinning ratio because paints vary between brands, colours and product lines. As a general starting point for water-soluble acrylics, you might use approximately two or three drops of paint for every one drop of thinner.


For many lacquer paints, the ratio may be closer to one part paint to one part thinner. Treat those as starting points rather than strict formulas. What matters most is the consistency. A common comparison is that properly thinned airbrush paint should have roughly the consistency of skim milk. More importantly, you can judge the mixture by how it sprays.


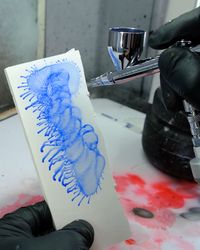
Properly thinned paint should spray smoothly and evenly, almost like velvet, without excessive speckling around the edges. Once you’ve spent some time airbrushing, you’ll start recognizing the correct consistency almost immediately.

What Happens if Your Paint Is Too Thin?

There are reasons to use more or less thinner, but generally you'll want to be careful with how much you add.

You can also go too far in the opposite direction. If your paint is excessively thin, it can hit the surface and immediately begin running. Instead of sticking where you sprayed it, the paint will flow across your model and collect in panel lines, recesses and crevices.


You may also find that the paint struggles to build even coverage. If your paint is running, add a little more paint to your mixture and try again.

What Happens if Your Paint Is Too Thick?

If the paint isn’t flowing smoothly, add a little thinner, mix it again and test your spray.

If your paint is too thick, it may refuse to spray altogether. More commonly, it will come out in a coarse, speckled pattern. That kind of spray can create unwanted surface texture, produce inconsistent coverage and potentially obscure the fine details on your model.


Sometimes poor paint flow can be improved by increasing your compressor pressure slightly, but more often than not, the real problem is simply that the paint needs more thinner.


Mixing Paint Inside Your Airbrush

One of the easiest ways to mix paint and thinner is directly inside the airbrush colour cup. You can do this using a technique called backflow, sometimes also called backflushing or percolating.


To do this, turn on your air compressor and cover the nozzle cap using your gloved finger or the silicone cap included with many airbrushes. Press down on the trigger to release air, then gently pull back. Because the front of the airbrush is blocked, air will be redirected backwards through the airbrush and into the colour cup. You’ll see the paint begin bubbling. Let it bubble for a few seconds and your paint and thinner will mix together.


I recommend doing this whenever you add paint, thinner or another additive to your colour cup. It’s also a useful technique when cleaning your airbrush, which we'll go over in more detail in Episode 4.

Pre-Thinned Hobby Paints

While pre-thinned paints might be helpful, sometimes marketing language can be a little misleading. Always look at some trusted reviews before you buy.

You’ll also find paints that are marketed as being pre-thinned or airbrush-ready. These can be convenient, but I still find that many of them benefit from a little additional thinning. Both Vallejo Model Air and Kaleido Colorworks are good examples.


If a supposedly airbrush-ready paint is still producing noticeable speckling, try adding a drop of the appropriate thinner and mixing it through the cup using backflow. The important thing is not what the bottle says. The important thing is how the paint actually behaves when it comes out of your airbrush.


Practice Makes Perfect

Thinning paint is one of those airbrushing skills that sounds complicated when someone explains it, but becomes surprisingly intuitive once you’ve done it a few times. You’ll gradually learn what properly thinned paint looks like in the colour cup, how it behaves when you spray it, and how to adjust your mixture when something isn’t working properly.


If your paint is speckling, try thinning it. If it’s running, add more paint. Pay attention to what your airbrush is doing and make small adjustments. Eventually, you won’t even have to think about it!

Coming Up in Episode 3

Take things to the next level with airbrushing technique!

Those are my basic notes on hobby paints! We’ve already covered the equipment, different types of paint, safety and thinning. Now we finally get to the fun part: actually painting something.


In Episode 3 of my Airbrushing Course for Beginners, we’re going to look at controlling your airbrush, developing basic spraying techniques and getting comfortable using the trigger.


Until then, happy building!

— Liam's Hobby Room × BC Hobbies

Every skill starts somewhere!

Liam's Hobby Room

More Posts

Airbrushing for Beginners 4Airbrushing for Beginners 4
Airbrushing for Beginners 4

Welcome back to my Airbrushing Course for Beginners (the blog version!), brought to you by BC Hobbies. I’m Liam and this is my hobby…blog? In this final episode of the series we’re going to cover one of the most important things you need to know about operating an airbrush:


How to clean one properly.


Cleaning is such an important part of airbrushing that I seriously considered making this the first episode. In the end, though, I think it makes more sense after you’ve built some familiarity with the tool, the paints you’re using, and how the airbrush actually operates.


A common misconception is that spraying a little thinner through your airbrush is enough to clean it. It isn’t. The real secret to cleaning an airbrush properly is understanding the type of paint you’ve been using and how that paint behaves once it begins to dry or cure. A lot of what we learned back in Episode 2 will come in handy here, but I’ll go over the important parts again as we need them.
Airbrushing for Beginners 3Airbrushing for Beginners 3
Airbrushing for Beginners 3

Hey there, my name is Liam and this is my hobby room. Welcome back to Episode 3 of my Airbrushing Course for Beginners (the blog version!), brought to you by BC Hobbies.


In Episode 2, we learned about the different types of paint you’ll be using, how to thin them properly, and what your paint should look like when it sprays.


Now we’re getting into the actual airbrushing. As I mentioned back in Episode 1, we’re working under the assumption that you have a dual-action, gravity-fed airbrush and an air compressor.


The goal of this lesson is to help you get comfortable using your airbrush so you can have the best possible experience when you start painting. By the end, you’ll understand how to control the trigger, how to set up your compressor, what to look for while spraying, and how to avoid some of the most common beginner mistakes.


Let’s start by taking a closer look at the airbrush itself.

Airbrushing for Beginners 1Airbrushing for Beginners 1
Airbrushing for Beginners 1

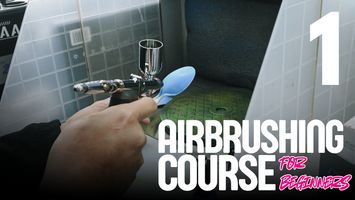
New to airbrushing? You’re in the right place. In Episode 1 of our Beginner Airbrush Course, Liam covers the basics you need before you start spraying—from choosing your first airbrush and compressor to setting up a safe workspace and understanding ventilation. Let’s get started!

<p>About This Blog</p><p>About This Blog</p>

About This Blog

A place to learn, build, and get better at the hobbies you love. We share practical tips, techniques, beginner guides, community projects, events, and helpful how-tos—with the occasional look at tools and products that can make the job easier.