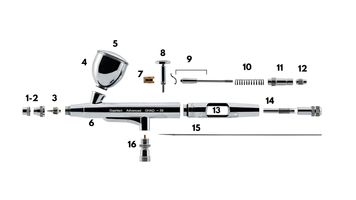
1 - 2 Needle & Nozzle Cap: Serves a dual purpose of protecting the needle and directing the spray pattern. Sometimes the needle cap, which sits at the spraying end is combined with the nozzle cap just behind it.
3 - Nozzle: Sometimes called a tip or cone, the nozzle is one of the most important parts of an airbrush. Like needles, nozzles wear out over time and will need to be replaced. The nozzle is a very delicate component, and can easily be damaged beyond repair by feeding the needle through the airbrush too forcefully.
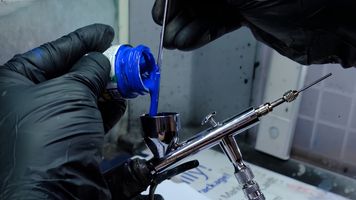
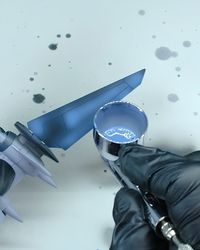
4 - Colour Cups: The Gaahleri GHAD-39 features two interchangeable colour cups, differing only in size. Each cup comes with an O-ring to ensure air and paint do not leak out of the cup’s connection point. Generally, I’d recommend just leaving the larger cup attached unless you know of a specific reason why you want the smaller colour cup attached.
5 - Colour Cup Lid: A metal lid that securely fits the colour cup via a friction fit. This prevents spillage, which you’ll want to avoid for two reasons: one is that it may stain whatever you spill on, but the more important reason is due to the smooth metal curves of your airbrush, the spilled paint will glide down, and flow along the bottom of your airbrush towards the tip.
Please note: Because you are spraying at a downward angle, if the paint spills and glides to the needle crown/cap it will be propelled forward by your airflow (without being atomized within the airbrush) and spit all over your project. Or your hands. Or both.
6 - Airbrush Chassis: The main body of your airbrush, which houses its internal mechanism and connects the whole shebang together.
7 - Packing Set: This is essentially a special-purpose O-ring and screw that prevents paint from flowing back into the airbrush past this point by creating a firm seal.
8 - Main Lever/Trigger: In a dual action system, the trigger has two functions. By holding it down it opens the air valve, letting the compressed air flow through parts 6-3-2-1 in that order. By pulling the trigger back, the mechanism moves the airbrush needle to allow the thinned paint to flow down through the aperture at the bottom of the color cup, mix with the air and atomize.
9 - Trigger Housing: Made up of the needle chucking guide and auxiliary lever. It sets the needle and “guides” it into the correct position, ensuring that it always moves correctly. The auxiliary lever allows more control over the back-and-forth motion, reducing the amount of movement needed to pull the trigger.
10 - Needle Spring: Allows the needle to slide back into place automatically, via the tension in the spring, which plugs the aperture when at rest and allows for better control of paint flow when spraying. Without this, one would have to manually move your needle back and forth. Springs lose retention over time and should be replaced when they begin to lose it.
11 - Spring Guide: This keeps the spring in the optimal position as well as secures all prior components in place via a screw, keeping the housing together.
12 - Needle Chucking Nut: A retention nut that screws on and keeps your needle in place. By gripping onto the needle via the rear of the trigger housing, it allows your needle to slide back-and-forth via manipulation of the main lever/trigger.
13 - Handle: A smooth section to aid in comfort while spraying and protection of the internal mechanisms. I generally leave this off while spraying depending on the job at hand. Uses an O-ring that keeps the handle airtight and secured.
14 - Fluid Control knob: Most dual action gravity fed airbrushes include this knob. It attaches to the back of the handle, and allows you to manually set the maximum distance the needle can slide back, therefore limiting the amount of paint released while spraying.
15 - Needle: Extremely pointy and delicate. The slightest drop or careless accidental impact to the needle cap/crown of your airbrush may bend the needle tip. Sometimes you can gently bend it back into place, but this is easy to get wrong and will sometimes result in snapping part of the needle off. A bent needle tip, however infinitesimal, will affect the angle, pattern and quality of your spray. You cannot spray with a broken needle.
16 - Air Valve w/ Spring and O-ring: Manipulated by the bottom of the main lever/trigger pressing against it to release compressed air into the brush. The included O-ring prevents compressed air from leaking out of the air valve, ensuring it travels up into the brush for its intended function to deliver to correct PSI.